
How to Photograph Candy Without Melting or Glare
On this page
- Quick answer
- Plan the shot before opening candy
- Control temperature and humidity
- Use soft light to control glare
- Choose backgrounds and supports
- Style candy with clean tools
- Set the camera for color and texture
- Work in short, repeatable batches
- Keep product images accurate
- Frequently asked questions
- Conclusion and shoot checklist
Quick answer
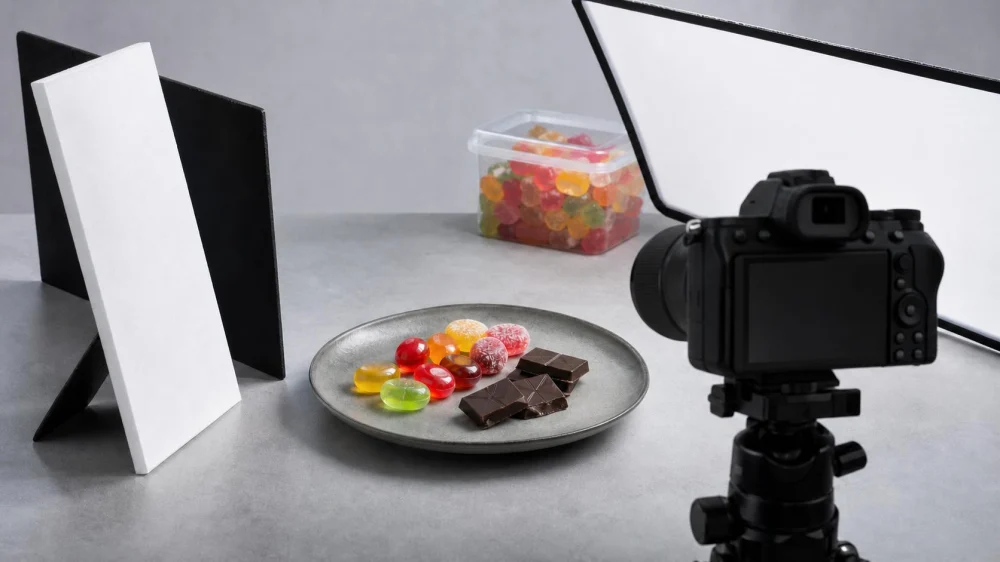
Prepare the camera, background, props, and lighting before candy leaves its package. Use a cool, dry room; soft side light; white and black cards to shape reflections; and clean food-safe tools. Photograph small batches, rotate fresh pieces into the set, and keep chocolate away from lamps, hands, and direct sun. Reduce glare by changing the light and camera angles instead of coating the candy with non-food substances.

Chocolate Museum & Cafe / chocolate museum and cafe
11701 International Dr #400, Orlando, FL 32821, USA
Plan the shot before opening candy
Candy changes quickly after handling. Chocolate picks up fingerprints, hard candy attracts lint, sugar coatings absorb moisture, and gummies can slump in warmth. Build a shot list first:
- Hero image of one product or arrangement
- Top-down group image
- Close detail of texture or filling
- Scale reference using packaging or a serving container
- Alternate crop for social and website layouts
Place empty stand-ins or similarly sized props while adjusting composition. Mark camera and plate positions with removable tape outside the visible area. Open only the quantity needed for the next setup.
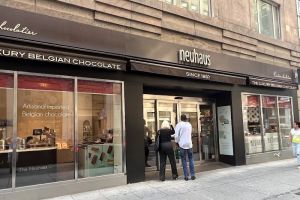
Neuhaus Chocolates / neuhaus chocolate near me
New YorkNew York CountyNew York
488 Madison Ave Between 51st, new location, E 52nd St, New York, NY 10022, USA
Control temperature and humidity
Use the product's storage instructions and a comfortable, stable room. Turn off hot continuous lights, keep the set away from windows with direct sun, and avoid placing candy near ovens, radiators, or computer exhaust.
- Keep reserve pieces sealed until needed.
- Handle chocolate briefly with clean gloves or tools.
- Allow chilled packages to approach the shooting environment while still sealed when condensation is a risk.
- Use a small batch and replace it when surfaces soften or sweat.
- Do not move candy repeatedly between freezer and warm set.
Refrigeration is not a universal solution. Rapid temperature changes can create condensation, sugar bloom, or texture changes. Follow manufacturer guidance for the specific product.
Use soft light to control glare
Glossy wrappers, hard candy, and chocolate show the shape of the light source. A large diffused source creates broader, smoother highlights than a small bare lamp.
- Place one large soft light or diffused window to the side and slightly behind the candy.
- Use a white card opposite it to lift dark shadows.
- Add a black card near an edge when the shape lacks definition.
- Move the light higher, lower, left, or right until glare reveals texture without hiding the product.
- Rotate the candy or camera a few degrees for stubborn reflections.
A circular polarizing filter may reduce some non-metallic reflections, but it cannot remove every highlight and may alter the look of wrappers. Cross-polarization is a more advanced setup and should not replace careful lighting.
Choose backgrounds and supports
Use matte, clean surfaces that contrast with the candy without changing its apparent color. Neutral white, gray, warm wood, or a restrained brand color often works.
- Use food-safe plates, parchment, acrylic blocks intended for the purpose, or clean paper backdrops.
- Hide supports behind or beneath the product.
- Keep crumbs intentional; random dust is magnified in close-up images.
- Avoid glitter, shedding fabric, loose paint, and unknown craft materials near exposed food.
- Separate the display sample from candy that will be sold or served.
Transparent candy benefits from backlight, while opaque chocolate often needs side highlights. Test the surface with an empty wrapper before styling the full set.
Style candy with clean tools
Use food-dedicated tweezers, small tongs, a soft clean brush, cotton gloves, and lint-free cloths. Wash or sanitize tools as appropriate and dry them completely.
For a natural arrangement:
- Place the largest shape first.
- Create small clusters rather than a perfectly even scatter.
- Turn logos away unless brand use is authorized.
- Expose a cut or broken interior only when it accurately represents the product.
- Remove fingerprints and crumbs between frames.
- Capture a clean plate before adding decorative mess.
Do not apply hairspray, oil, glycerin, glue, or cleaning chemicals to edible candy. If a non-edible display duplicate is used, label and isolate it so nobody consumes it.
Set the camera for color and texture
- Tripod: Keeps framing consistent and allows lower sensitivity.
- Manual or locked exposure: Prevents brightness from changing between similar shots.
- Custom or fixed white balance: Helps preserve consistent color.
- Moderate aperture: Keeps key surfaces sharp while separating the background.
- Low ISO when practical: Preserves fine sugar and chocolate texture.
- Remote or timer: Reduces camera movement.
Check highlights on wrappers and pale candy so they are not clipped to pure white. Zoom in to confirm focus on the product feature that matters, not a nearby sugar crystal.
Work in short, repeatable batches
- Photograph the coolest or most heat-sensitive product first.
- Keep the reserve supply sealed away from the set.
- Complete wide, medium, and close shots before changing the arrangement.
- Replace softened, scratched, dusty, or fingerprinted pieces.
- Save one untouched sample for color and size reference.
- Record the light position, camera settings, and background for reshoots.
For a large catalog, standardize the crop, product angle, distance, and color workflow. Consistency reduces handling time and makes comparison easier.
Keep product images accurate
Editing should correct exposure, white balance, dust, and minor capture flaws without misrepresenting size, count, filling, color, coating, or packaging. Do not clone extra candy into a package image unless the final quantity is clearly disclosed as an illustration.
Maintain a neutral reference frame and review images on a calibrated or consistent display. Candy color can be especially sensitive to warm room light and automatic phone processing.
If the image advertises a product, confirm current labeling, trademarks, packaging, props, and required disclosures with the owner or platform.
Frequently asked questions
Why does chocolate look gray in photos?
Cool white balance, flat lighting, bloom, or clipped highlights can reduce rich color. Confirm the product condition and use controlled side light plus a neutral reference.
How do I remove glare from hard candy?
Make the light larger and softer, then change its angle, the camera angle, or the candy rotation. Some highlight is useful to show gloss.
Should I refrigerate chocolate before shooting?
Follow product guidance. Chilling can create condensation when the package is opened in a warm or humid room.
Can I use my phone?
Yes. Stabilize it, lock exposure and focus when possible, use soft light, avoid digital zoom, and check that automatic processing preserves true color.
What should I do with photographed candy?
Do not sell or serve display samples that were handled extensively, exposed to non-food props, or treated with any non-food material.
Conclusion and shoot checklist
Build the set first, stabilize a cool dry room, diffuse the light, shape reflections with cards, handle candy with clean tools, and work in small batches. Lock color and exposure, capture multiple crops, and edit honestly. Good candy photography protects texture by solving the image with preparation and light—not heat, coatings, or endless handling.


 Cousin's Candy Shops4.0 (241 reviews)
 Russell Stover Chocolates4.0 (901 reviews)
 Krause's Chocolates of New Paltz4.0 (151 reviews)
 Harbor Sweets Copley5.0 (1 reviews)
 Dulceria La Colmena4.0 (32 reviews)
 Sugarpop Candy Bar2.0 (24 reviews)
 Top Candy Shops for Tourists in New York – Best Sweets and Treats
 Best Candy Shops in New York - A Sweet Adventure Through the City
 How to Make Candy-Themed Crafts for Christmas Gift Giving
 How to Make Chocolate-Covered Strawberries for Kids: A Fun and Easy Recipe
 How to Make Easy Gummy Worms at Home | Homemade Candy Recipes
 How to Host a Candy-Themed Movie Night | Fun and Sweet Ideas