
- 1. Why Chocolate-Covered Oreos Are a Great Treat
- 2. Ingredients You’ll Need for Homemade Chocolate-Covered Oreos
- 3. Step-by-Step Guide to Making Chocolate-Covered Oreos
- 4. Creative Ideas for Decorating Your Chocolate-Covered Oreos
- 5. Tips for Storing and Serving Chocolate-Covered Oreos
1. Why Chocolate-Covered Oreos Are a Great Treat
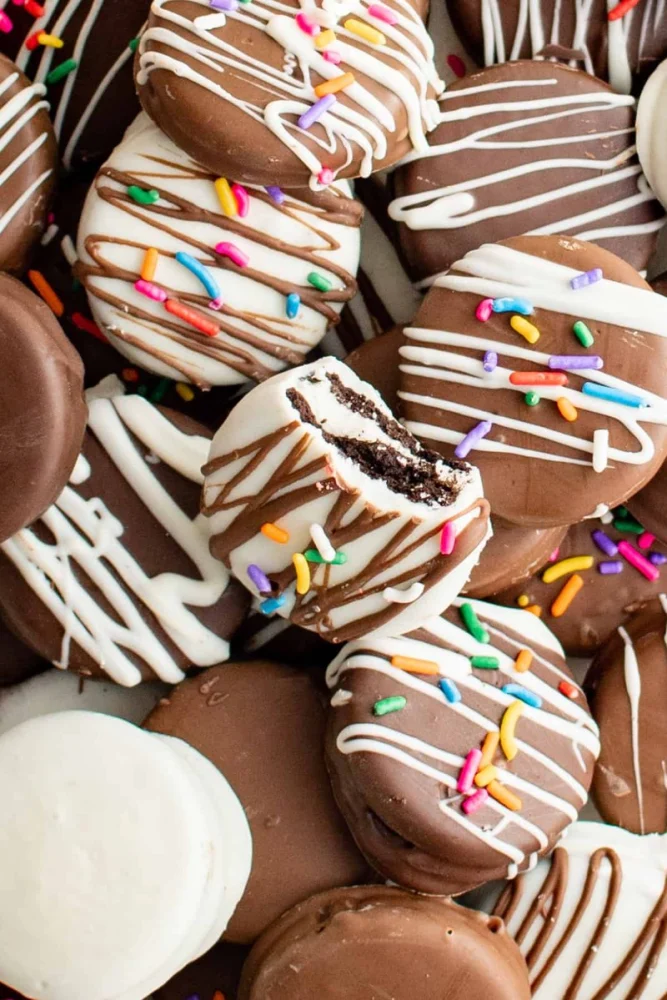
Chocolate-covered Oreos are a crowd-pleasing treat that combines the creamy goodness of Oreo cookies with the rich indulgence of smooth chocolate. Whether you’re making them for a party, holiday, or as a homemade gift, they are an easy-to-make, customizable, and fun treat. Their versatility in decoration allows you to get creative with your toppings, making them perfect for any occasion.

Chutters / chutters littleton nh
LittletonGrafton CountyNew Hampshire
43 Main St, Littleton, NH 03561, USA
2. Ingredients You’ll Need for Homemade Chocolate-Covered Oreos
Making chocolate-covered Oreos is simple, and you don’t need many ingredients. Here’s what you’ll need:

Anthony-Thomas Candy Shoppe / anthony thomas candy shoppe
ReynoldsburgFranklin CountyOhio
7129 E Main St, Reynoldsburg, OH 43068, USA
2.1 Oreo Cookies
Choose your favorite Oreo flavor. While the classic chocolate Oreo is a staple, you can experiment with different Oreo varieties like golden Oreos or mint Oreos for a unique twist.
2.2 Chocolate
You’ll need chocolate to coat the Oreos. You can use milk chocolate, dark chocolate, or white chocolate depending on your taste. You can also opt for chocolate chips or chocolate bars, both of which will melt easily.
2.3 Toppings (Optional)
While not necessary, toppings like sprinkles, crushed nuts, or drizzles of colored candy melts can add an extra layer of fun and flavor to your chocolate-covered Oreos.
2.4 Tools
To make the process easier, you’ll need a few basic kitchen tools: a double boiler or microwave-safe bowl for melting the chocolate, a fork or dipping tool to dip the Oreos, and parchment paper for setting the finished Oreos to cool.
3. Step-by-Step Guide to Making Chocolate-Covered Oreos
Making chocolate-covered Oreos is easy and fun! Follow these steps to create your delicious treats:
3.1 Melt the Chocolate
Start by melting your chocolate. You can do this using a double boiler or in the microwave. If you’re using the microwave, heat the chocolate in 30-second intervals, stirring between each, until it’s fully melted and smooth.
3.2 Dip the Oreos
Next, take your Oreos and dip them into the melted chocolate. Use a fork or a dipping tool to carefully coat each cookie, ensuring that it’s fully covered with chocolate.
3.3 Add Decorations
While the chocolate is still soft, you can add sprinkles, crushed nuts, or other decorations. Be creative and have fun with this part! You can also drizzle extra chocolate on top for a more decorative look.
3.4 Set the Oreos
Place the dipped Oreos on a piece of parchment paper and allow them to set. You can speed up the process by putting them in the fridge for about 15-20 minutes, or until the chocolate has hardened.
4. Creative Ideas for Decorating Your Chocolate-Covered Oreos
The beauty of homemade chocolate-covered Oreos is that you can customize them to suit any occasion. Here are some fun decoration ideas:
4.1 Holiday Themes
For Christmas, drizzle red and green chocolate over your Oreos and top with festive sprinkles. For Halloween, try dipping the Oreos in orange and black chocolate and adding spooky decorations like mini candy eyeballs.
4.2 Personalized Touches
Use colored candy melts to create designs, initials, or messages on your Oreos. This can make them more personal and thoughtful, especially if you're gifting them.
4.3 Fun for Kids
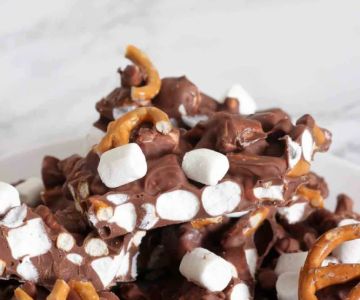
If you’re making these with kids, let them add their own toppings! Have bowls of mini marshmallows, crushed pretzels, or colorful candy pieces for them to sprinkle on top.
5. Tips for Storing and Serving Chocolate-Covered Oreos
Once your chocolate-covered Oreos are ready, you’ll want to store them properly to keep them fresh and delicious. Here are some tips:
5.1 Storing
Store your chocolate-covered Oreos in an airtight container at room temperature for up to one week. If you want them to last longer, you can refrigerate them for up to two weeks.
5.2 Serving
Chocolate-covered Oreos are perfect for parties or as gifts. Serve them on a decorative tray or package them individually in small cellophane bags tied with a ribbon for a personal touch.


 Chukar Cherries in Pike Place Market4.0 (68 reviews)
 Lindt Chocolate Shop4.0 (546 reviews)
 Log Cabin Candies4.0 (187 reviews)
 EJ Chocolates4.0 (53 reviews)
 Neuhaus Chocolates5.0 (18 reviews)
 THE CHOCOLATE HOUSE4.0 (6 reviews)
 Top Candy Shops for Tourists in New York – Best Sweets and Treats
 Best Candy Shops in New York - A Sweet Adventure Through the City
 How to Make Candy-Themed Crafts for Christmas Gift Giving
 How to Make Chocolate-Covered Strawberries for Kids: A Fun and Easy Recipe
 How to Make Easy Gummy Worms at Home | Homemade Candy Recipes
 How to Host a Candy-Themed Movie Night | Fun and Sweet Ideas