
- - Why You Should Try Homemade Chocolate Bark
- - Ingredients You’ll Need for Chocolate Bark
- - Step-by-Step Guide to Making Chocolate Bark
- - Variations and Tips for Customizing Your Bark
- - Storing and Serving Your Chocolate Bark
- - Conclusion: Enjoy Your Homemade Chocolate Bark!
1. Why You Should Try Homemade Chocolate Bark
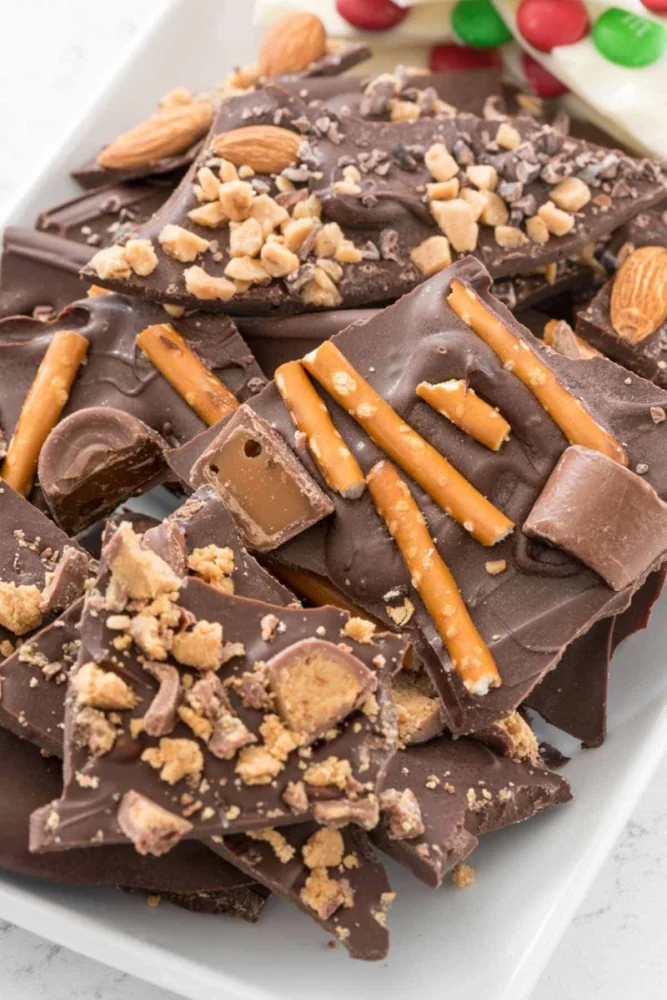
Homemade chocolate bark is not only incredibly easy to make, but it's also a customizable treat that’s perfect for satisfying your sweet tooth. Whether you’re preparing a snack for yourself or making a thoughtful gift for friends and family, chocolate bark with nuts and fruits is an ideal choice. The combination of creamy chocolate, crunchy nuts, and sweet fruits creates a perfect balance of flavors and textures, making it a go-to indulgence.
In this article, we’ll show you how to create your own homemade chocolate bark, packed with nutritious nuts and fruits, for a treat that’s both delicious and satisfying. Whether you prefer dark chocolate or milk chocolate, you can personalize the recipe to suit your tastes. Plus, homemade chocolate bark makes for an excellent holiday gift or party snack!

Sugar Planet / sugar planet ocean city md
Ocean CityWorcester CountyMaryland
407 Atlantic Ave, Ocean City, MD 21842, USA
2. Ingredients You’ll Need for Chocolate Bark
Making chocolate bark is simple, and you likely already have most of the ingredients at home. Here’s what you’ll need:

MarieBelle / mariebelle chocolate
New YorkNew York CountyNew York
484 Broome St, New York, NY 10013, USA
2.1 Basic Ingredients
- Chocolate: You can use any type of chocolate—dark, milk, or white—depending on your preference. For a richer taste, dark chocolate is often preferred.
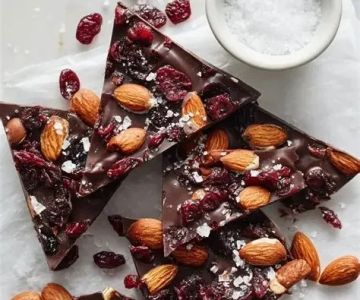
- Nuts: Almonds, pecans, walnuts, and pistachios are great choices. You can use a single nut or mix several types for variety.
- Fruits: Dried fruits such as cranberries, cherries, or raisins pair wonderfully with chocolate. You can also use fresh fruits like strawberries or oranges for a zesty twist.
2.2 Optional Additions
- Sea Salt: A sprinkle of sea salt enhances the sweetness of the chocolate and adds a savory contrast.
- Spices: Add a dash of cinnamon, chili powder, or ginger for an extra kick.
- Coconut Flakes: Shredded coconut adds a tropical flavor that complements the richness of the chocolate.
3. Step-by-Step Guide to Making Chocolate Bark
Making chocolate bark is easy and takes very little time. Here’s a simple step-by-step guide to get you started:
3.1 Melt the Chocolate
Start by melting your chocolate. You can do this in a microwave or over a double boiler. If using the microwave, heat the chocolate in 30-second intervals, stirring in between to avoid burning. If using a double boiler, place the chocolate in a heatproof bowl over a pot of simmering water, stirring occasionally.
3.2 Prepare the Baking Sheet
Line a baking sheet with parchment paper or a silicone baking mat. This will make it easier to remove the bark once it’s set.
3.3 Pour and Spread the Chocolate
Once the chocolate has melted, pour it onto the prepared baking sheet. Use a spatula to spread the chocolate into an even layer, about 1/4 inch thick.
3.4 Add the Nuts and Fruits
Sprinkle your chosen nuts and dried fruits evenly over the melted chocolate. You can press them lightly into the chocolate so they stick. For added flavor, consider adding a sprinkle of sea salt or your choice of spices at this stage.
3.5 Chill the Bark
Place the baking sheet in the refrigerator for at least 1 hour, or until the chocolate is completely set and firm to the touch.
3.6 Break into Pieces
Once the chocolate has hardened, break it into uneven pieces with your hands or a knife. The irregular shapes are part of the charm of chocolate bark!
4. Variations and Tips for Customizing Your Bark
One of the best things about homemade chocolate bark is how customizable it is. Here are some ideas to help you experiment with different flavors and textures:
4.1 Experiment with Different Types of Chocolate
If you’re a fan of white chocolate, try making a bark with white chocolate, dried strawberries, and pistachios. For those who prefer a richer flavor, dark chocolate is the way to go, especially with sea salt and roasted almonds.
4.2 Mix and Match Nuts and Fruits
Mixing different types of nuts and fruits creates layers of flavor in every bite. Try adding roasted cashews, hazelnuts, or macadamia nuts along with dried blueberries, mango, or figs for a new spin on the classic recipe.
4.3 Add a Spice Twist
For a more adventurous bark, add a pinch of cinnamon or cayenne pepper for warmth. This pairs particularly well with dark chocolate and fruits like cherries or orange zest.
5. Storing and Serving Your Chocolate Bark
Chocolate bark is a treat that keeps well for several days. Here’s how to store and serve it:
5.1 Storing Chocolate Bark
Store your homemade chocolate bark in an airtight container at room temperature for up to 1-2 weeks. If you live in a warm climate, it’s best to store the bark in the refrigerator to prevent it from melting.
5.2 Serving Suggestions
Chocolate bark makes a great addition to holiday gift baskets or as a snack for parties. You can even break it into smaller pieces and drizzle some extra melted chocolate on top for a gourmet touch.
6. Conclusion: Enjoy Your Homemade Chocolate Bark!
Making homemade chocolate bark with nuts and fruits is simple, fun, and customizable. Whether you’re preparing it as a special treat for yourself or as a thoughtful gift for friends and family, it’s a guaranteed crowd-pleaser. So, get creative, experiment with different ingredients, and enjoy your delicious chocolate bark!
For more sweet ideas and delicious treats, visit Gaias Candy for the best products and services related to homemade candy-making!


 Jagielky's Homemade Candies4.0 (89 reviews)
 Sugar Daddies Goodies Freeze-Dried Candy5.0 (4 reviews)
 Fannie May4.0 (44 reviews)
 Freeze Dried FX5.0 (12 reviews)
 Candy Craze4.0 (55 reviews)
 Copper Line Confectionery0.0 (0 reviews)
 Top Candy Shops for Tourists in New York – Best Sweets and Treats
 Best Candy Shops in New York - A Sweet Adventure Through the City
 How to Make Candy-Themed Crafts for Christmas Gift Giving
 How to Make Chocolate-Covered Strawberries for Kids: A Fun and Easy Recipe
 How to Make Easy Gummy Worms at Home | Homemade Candy Recipes
 How to Host a Candy-Themed Movie Night | Fun and Sweet Ideas